Saturday, December 22, 2012

'Tis the Season (Part Five, Final Installment)

Welcome to the final installment of my Christmas themed blog posts! This post features just a couple projects and decorating ideas that I used around the house this year. Enjoy!

After creating the large pallet sign for church, I got the harebrained idea to create more signs! The first sign I created was small dark green piece with white printing, MERRY CHRISTMAS. After painting the sign and lettering, I used a piece of sandpaper to rough the piece up just slightly on the edges and across the words, just slightly.  


The second small sign I created was for a family white elephant gift exchange that has a rule about being self crafted or created.  I got this idea from Pinterest (Go figure!), and simply downsized the piece. Although I would still LOVE to create a full size sign! 


The green sign became part of my alternative wreath project, featuring a family heirloom sled from Germany and a greenery arrangement tied with a plaid ribbon. So if you come a-caroling, you will be greeted by this cheery Christmas sled! 


I believe that all parts of the home are fair game for decorating, so in order to make my room look and smell extra Christmas-y I made a very simple display on the top of a bookshelf.  I took a medium sized vase and filled it with cedar greens. Using the same green and red plaid ribbon from the sled display, I tied a simple bow around the top of the vase to add a hint of color. To finish the look, I used a piece of the vintage sheet music paper chain. I did not do anything fancy with it, choosing to just drape it casually around and over my picture frames.   


I love the simple look, and the yummy evergreen aroma that now fills the space.  Plus I just LOVE Christmas, so the decorations bring me all sorts of holiday joy!


Being this is the final installment of my 'Tis the Season blog series, and Christmas is just days, hours, moments away, let me close with a heartfelt thank you for following my blog! 

May you and your loved ones enjoy a Merry Christmas and holiday season filled with peace and blessings! 

'Tis the Season (Part Four)

Is it strange that one of my absolute favorite parts of the Christmas season is wrapping presents??? I love giving gifts to people, but they have to be wrapped just so. Go figure. Every year I coordinate all of my gifts and make them match. 

This year I found the cutest item at my favorite store, Vintage Hardware. For ten cents, I acquired an old printing press metal stamp featuring a reindeer and tree! Not meant to be a craft stamp, but it works!


I used chocolate brown or bright red ink to add the stamp to each name tag. The color of stamp determined the color of string that I used to tie up the gifts. Red stamp = red string, brown stamp = brown string. 


Of course I had to have a theme! In good holiday spirit, I chose "Brown paper packages tied up with string," a lyric from the song "Favorite Things" sung by Julie Andrews in The Sound of Music. Initially I planned on stamping the words in place, but after completing the first present, I realized that I just didn't have the time! Note to self: Find a stamp or order a custom one with the phrase as a whole. 
I chose to use a bright red pen to simply ink the phrase onto each package.  It is a good thing that I teach cursive, my practiced penmanship held up to the test!


The final product is a group of simple yet festive holiday packages for joyous gift giving!


Tuesday, December 11, 2012

'Tis the Season (Part Three)

As if I didn't have enough projects on my plate, I suggested making a pallet sign for church! Silly me! Though it was challenging, it was still a fun and rewarding project.  My Uncle Larry was so kind to collect and deliver a couple pallets from which to take slats, and my dad was nice enough to dismantle them for me while I was doing other projects! (I wouldn't get a thing done if it wasn't for the people in my life.) Once they were separated, my Aunt Kathy and I selected the best boards to use and got them sanded down, to make them both smoother and cleaner in color. We used a lower grit because our goal was not too have paper soft wood, but rather get rid of larger marks and damage to the wood. 


We then arranged them in the order that we wanted, and my dad attached the support beams.  The beams are not too thick, only about a half inch, but they are long so they can secure all of the slats. 


He attached the beams to the back of the sign with screws so the bracketing would be invisible. The holes that are visible below are from the pallet nails, but I think they add character. 


Once assembly was taken care of, I mixed a forest green craft paint with a large quantity of water.  This mixture became the base wash for the sign.  I got a bit nervous once it was all washed because while it was wet it seemed to have a mossy, mildew look. Fortunately it dried much nicer, or else it would have been back to the sander!


My paint was named "Evergreen" which was most appropriate considering our country Christmas theme called for traditional Christmas greens!


At this point, I laid out the text in the format in which it would go on the sign.  I used to generic fonts that come pre-installed on Microsoft Word, Bodoni MT and Monotype Corsiva. The font size varied depending on the text, but I chose to emphasize key words with size and make lesser words a bit smaller.  This can be totally up to your own discretion and relies heavily on the space and board width available. 


Because I am quite possibly crazy, and probably because I had limited resources, I hand traced all of the words onto the wood pallets.  This involved me outlining the words while the paper was still in place, but pressing hard enough that the pencil made a dent in the wood below.  Then I carefully and lightly outlined those indentations using the pencil for a more visible line within which to paint.  When everything was indented and traced, I took my white Sharpie Medium Point Paint Pens and began outlining! The paint required three to four coats because the wood was so dry, the first coat basically just absorbed. The picture below shows words at various levels of painting.  The words at the bottom had received three coats, the center lines had two coats and the top, faint areas only had the first coat.  


I did choose to free hand the Bible reference at the bottom, for two reasons, I forgot to print the reference with the rest of the verse, and I was running out of patience for tracing! I decided that my daily cursive lessons for my students needed to come in handy in the real world! 


The sign was hung (more generous and mostly patient help from my dad!) in the sanctuary above the main doors for all to see! He used two anchors and two 3 inch screws to attach it to the wall.  He was actually able to attach through one of the gaps between the boards so it did not require a hanger or wire on the back. Fortunately the screw were a good color to blend in with the green tint! 
I am so proud of how well it turned out, especially because I was a bit nervous that it would be too rough in appearance to be hung in a church.  I received a few compliments even from people who then asked if they could bring me pallets to make them a sign! Um... first I need to finish the mini sign for myself! 

That mini sign and my Christmas present wrapping paper theme are next on the docket for the Christmas series so stay tuned! And happy crafting!

Monday, December 10, 2012

'Tis the Season (Part Two)

Well hello! Welcome to the part two of my Christmas crafting series! On Friday we had a decorating party at church in order to get the church ready for Christmas. Many hands make light work!

Using the same vintage sheet music that was used for the Adore Him banner, I printed the music onto cream colored paper. I then cut the paper along the long sides, so I got 11 strips out of each piece of paper.  Then it was time to get gluing! I'm quite certain that I made at least 100 feet of chain!


Paper chain went everywhere! Including on the ledges that surround the piano areas.  The printed burlap was picked up on sale at Joann's and the candles are battery powered finds from Costco! My goal was to make the placement look natural and not too symmetrical.  


And more garland! With beautiful glass jar candles from Fred Meyer, on sale for only $1.20!


The Advent wreath this year is also quite simple in nature.  My cousin Brittany did a beautiful job of weaving in greenery and adding the single white poinsettia for accent.  So simple, yet so pretty!


My Aunt Kathy had the great idea to hang white ornaments from the balcony railing with white ribbon.  They are hung at varying levels to give more dimension! 


When in doubt add more burlap! Tree skirt in natural burlap!


Still doubting? Add more paper chain! The tree features the paper chain, white pine cones, and white poinsettias.  The tree was then topped with a white tulle bow (not placed as of the picture).


The altar features white lighted garland and a greenery arrangement with white roses. The altar railing has lighted green garland, the vintage music paper chain, and tulle bows that match the tree. 


Overall our goal was to keep the decorating simple. I think we did a beautiful job of capturing the simple country charm inspired by the vintage sheet music. ENJOY!


Sunday, December 9, 2012

'Tis the Season (Part One)

This is the first of at least four blogs entries focusing on Christmas projects! The first blog is about a Christmas banner for church, the second features the overall decorating scheme for the church, the third will showcase a pallet sign, and lastly my Christmas wrapping theme for this year! And perhaps one or two more! Oh such a busy time of year! 

This one is about a simple and classy looking banner that my Aunt Kathy, Mom, and I created. The banner base was made of natural burlap and creamy colored thread.  My mom was the sewing superstar and took care of the hemming and stitching the top loop from which the banner would hang.  

I took on tracing 6 inch monogram letters on to vintage sheet music that I copied on to card stock. Then my Aunt Kathy and I cut out all the letters so they would be ready to attach to our newly minted banner.   
Vintage sheet music featuring Christmas carols! 
Using a straight edge and tape measure so we made sure to stay aligned, we laid out our letters! Then we used a caulking-like all-purpose adhesive to attach the letters to the burlap (fortunately for us, it dries clear!) We made sure all the edges had a small fringe to add detail to the banner. 


I promise we ironed the burlap, but of course, the picture below looks like we didn't do a thing! Oh brother! I promise it looks great in person! 'Tis the season for "Adoring Him!" 


Stay tuned for more Christmas Merry Making! Coming up next: Christmas decorations in the church! 

Sunday, December 2, 2012

Give Thanks!

This November my family hosted some of our extended family for Thanksgiving. It was especially wonderful this year because my brother and his girlfriend were able to be with us for the week from Minneapolis.  I was put in charge of decorating the dining room for the event.  I chose to cut brown shipping paper into 8.5 by 11 inch sections so I could run it through the printer.  I selected two different fonts with two different sayings.   The fonts were downloaded from the Internet, Kunstler Script and Mailart Rubberstamp.  I then cut them into strips by hand, not being bright enough to use my paper cutter. It went pretty quickly though, and they didn't need to be perfect.  


I then simply created loops and opted to tape the edges together for time and efficiency purposes.  The chain became the table runner instead of a traditional cloth one. 


I also created my own place cards out of colored card stock and more brown mail wrap paper.  I created a stencil of a maple leaf from my school's Ellison punches then took the stencil home to trace and cut out.  My wonderful father helped in the process by being the tracer and scissor man.  I greatly appreciated his help! I then glued the leaf centers, but not the edges, to the card stock.  Each leaf went on slightly differently allowing each place card to be unique.  I added the names using dark brown ink and small alphabet stamps in haphazard patterns.  


The final piece of decorating utilized our old upright piano and a handful of brown paper lunch bags.  I had read a blog about how to print on paper bags and decided to give it a try.  It was quite simple and worked perfectly.  I used the same Rubberstamp font from the paper chain so they were connected, and printed one letter per bag.  I spelled out the word THANKFUL.


I then cuffed each bag by rolling the top down twice which made it easier to light the votives that were inside.  


Each votive lived in a glass holder so they were fire safe and used a clicking lighter with the long bendable nozzle to light them safely.  We ate earlier in the day before it was dark out, but after the sunset, the effect was beautiful.  


This year was so full of blessings and I had so many things to be thankful for, especially the wonderful time with my family and getting to see my brother. I hope your Thanksgiving was full of blessings too.  


Pinterest Projects!

If you are not familiar with Pinterest, it is essentially an online place to organize ideas, pictures, articles, anything onto virtual pin boards.  Plus it is hopelessly addicting...

Anyway, the hardest part for me is actually doing the neat projects and ideas that I pin. This fall I was able to use some of the clever plans I recently pinned to my advantage.  Although these projects are not really related, I figured a Pinterest project blog would save you and I the time of a few mini blogs.  

The first idea I implemented was for the benefit of my classroom.  I snagged it from Pinterest, but the original  idea came from Apartment Therapy.  I store more than colored pencils in my bins, opting to add various sizes of markers too.  

If you could see the lids, you would notice that they match the color of the products in the jugs. (Of course I did that)
My students thought this was just the coolest thing ever, and even one of my colleagues set about doing this in her class too!

My next project was to make a last minute Halloween costume in the form of a simple tutu.  I picked up two different colors of tulle from the fabric store, in full yardage rather than the easier rolls of 6 inch tulle (only because our store was sold out.) I cut strips of tulle in 6 inch widths and then folded them in half length wise. I attached the tulle to a wide strip of grosgrain ribbon in a coordinating color by pulling the loose ends through the loop created by the fold.  


Of course I failed to take a picture of myself wearing it, or have a picture taken so you can't see the final look. Blogging fail. Sorry!

I have more projects that I want to complete, but they will have to wait with all the holiday buzz! Just keep pinning!

Fun with Fungi!

Don't be turned away by the title! I promise this fungus was for the purpose of learning. I have to say that since I'm such an anti germ and gross things sort of person and have a sensitive nose, this was a huge deal for me as a teacher.  Normally I don't do food in the classroom because it is more of a mess than it is worth, but for the sake of experimenting I brought in food and we grew mold.

Our experiment called for slices of bread, pieces of banana, and orange slices.  We sealed samples of all three foods in our zip lock bags so they were not exposed to excess air.  Then students placed their bags in various places in the classroom, some dark hidey-holes and others in the sunlight.

After the first week of sitting, the students came back to discover some green, gray, and white spotting on the orange and bread, as well as fuzzy sections.  The banana was just a bit mushy and had brown veins running through it. 


After another week of sitting, the bags were getting extra disgusting.  The banana was barely holding it gooey shape, the bread was completely covered in fuzzy mold, and the orange had turned into a furry, white blob.  Plus, the bags were starting to smell... Not good for me or my sensitive nose! The little drawer that stored one of the bags was a bit odorous upon opening... Students and I quickly agreed that they were garbage bound after that! 


As yucky as these baggies were, they did offer some neat insight into the world of mold and fungus.  The students enjoyed observing the different types of fungus that grew, and then they created drawings of each item and its respective mold.  Each picture was then given a short description, either in paragraph form or as bullet points. They also made for great bulletin board material!

Catching Up

Oh my goodness! It's already December and it has been six months since I blogged last! I have so much to get caught up on. Plus, now that the holidays are upon us I'm busy with all sorts of projects which means there are a stack of blogs coming in the next couple weeks. My next couple are catching up on the start of a new school year, Halloween, and Thanksgiving.  Next weekend I'll have some great Christmas decorating ideas as well.  Stay tuned and thanks for your patience! Tis' the season for busy, but more importantly tis' the season for hope and joy.

Saturday, June 16, 2012

Summer Send Off!

This year I created summer gift bags for my students again. Every gift they receive from me involves books! Duh, what else do teachers give?! Thanks to Scholastic Book Clubs, I can purchase books for $0.95 each and get more for free using my bonus points! I got the kids three books, one for each summer month. These included, Old Yeller, The Lemonade War, and I Survived: The Sinking of the Titanic.


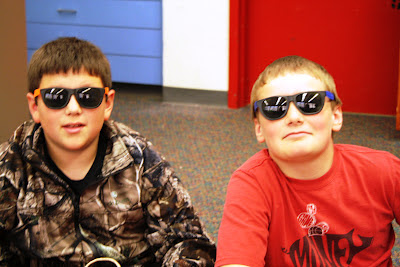
I also included summer fun items in matching colors; pencils, erasers, bubbles, and sunglasses! They looked sort of impressive and the color coordinator in me was giddy over how they matched! The pencils came in packs of 12 from Dollar Tree and the erasers came in 6 packs from the same place.  I picked up the bubbles from there too, in packs of 3.  The sunglasses came from Oriental Trading in bundles of 10. 


I used red paper gift bags that I got from Dollar Tree and then used construction paper in blue and white to add decoration.  Using the Ellison paper punch at school and the star shaped punch, I made patriotic themed bags! 

The gifts were a hit! And my students were adorable in their new shades! They were particularly awesome as we all exited to the busses! I am so proud of these kids!


Here's to a happy, sun and fun filled summer!