Showing posts with label church. Show all posts

Monday, December 9, 2013

We Wish You a Merry Christmas! (Part Two - Felt banner)

If you saw my part one post in the Christmas series, you may have noticed the God Jul felt banner that I created for the church entryway wall. The project was SO simple, that I was tempted to make a second one for home, but realized that I was OUT OF WHITE FELT! Oops! 

MATERIALS:
White felt (6 sheets 9x12 sheets or cut the 12x18 sheets in half)
Red felt (I used 1.5 12x18 sheets)
Stencils
Tulle ribbon or other ribbon of choice
Glue (Hot glue was great!)

I printed out the font I wanted from Microsoft Word, and selected Rockwell at size 710! I would have used a much smaller size for home, but wanted these to be large and fill a big wall.


I then cut my stencils and traced them backwards onto the red felt so that when I cut the felt, the front would be free of markings.   

I then cut my 12 inch by 18 inch white felt in half. Using the hot glue, I folded about one and half inches of felt down to make a casing. I ran hot glue along the 9 inch edge and folded the edge down to seal the casing.  Complete this step on all of the pieces of white felt (you should have 6 matching rectangular pennants with a casing at the top). 


I then took the red felt letters that I had previously traced and cut, and using more HOT GLUE! attached them to the white pennants.  I did my best to center them left to right, but kept them a bit lower than centered top to bottom.  That was just a personal choice! Do what YOU want! 

Once I had all of my letters secured, I strung them with red tulle ribbon from Jo-Ann Fabric.  It's about six inches wide, but scrunched up when I threaded it through the casings.  
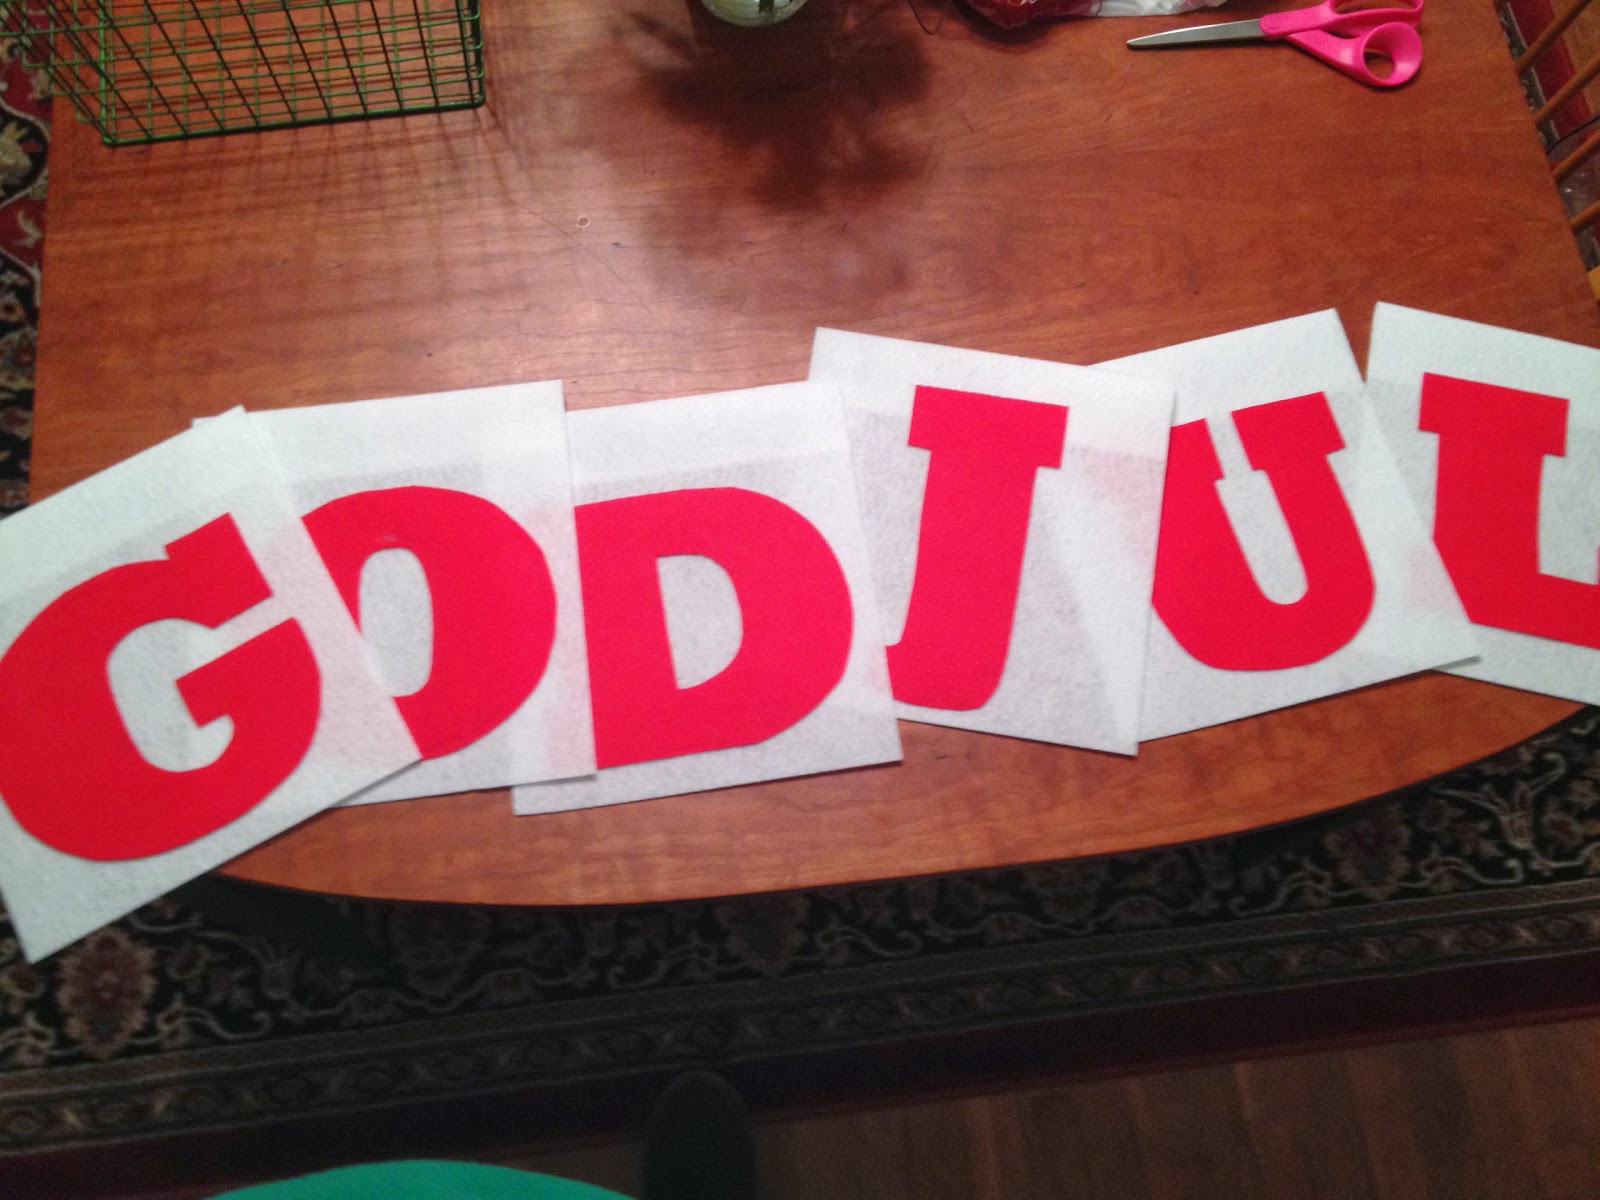


I tied bows on other side of the banner prior to hanging it on the wall.  The fluffy bows were great for hiding the push pins and gave it just a bit more flair!


GOD JUL or Merry Christmas to everyone! Keep watching for part three! See you soon!


We Wish You A Merry Christmas! (Part One)

Oh hello! It's that magical time of year again! My favorite month of all, December! It's my birthday month and Christmas, my favorite holiday, so needless to say I'm just jolly! This time of year also means that it is time for my Christmas blog series.  Again, you will see this year's decorations at church, around the house, a quick wrapping post, and some very neat gift ideas (those will have to wait though since I have to give them so my readers that receive don't have a spoiled surprise!). Ooh! And I hope to get a post in about a fun new find that I want to put on the front porch! Merry Christmas and enjoy!!!

Starting off with decorations at my church, which features a Scandinavian theme. The theme is highly appropriate for a couple reasons, the first being that the church was founded by Scandinavians, the second being that we are hosting a few events this season that we wanted to give a Scandinavian feel, so rather than re-decorate, it was best to make it the whole theme! Many hands make things go so much faster, so a huge THANK YOU goes out to those that volunteered their time and energy! 

Everything is very simple and traditional; the color scheme is red and white with evergreens and burlap. I'll try to keep the descriptions to a minimum (I'll caption each picture like I did for the Thanksgiving post). Most of the decorations are easy to put together and I have a separate post for the felt banner.

The week prior to decorating is usually spent preparing. Lots of paper chain, and turning my burlap Thanksgiving table runners into squares! 
Picked up a dozen poinsettias from Costco for $60. Best price that I could find in town. They are used all over the building, but we have four that brighten up the altar.  On each side I used a clear cake stand to give dimension in height. 
Here is where the burlap squares came into play! I don't love the gold/silver foil that the poinsettias were wrapped in, so I trimmed the foil down so it could hide under the burlap and sheer red ribbon.
My aunt Kathy (she is so clever, and I like to think that craftiness runs in the family!) decorated the Advent wreath and table so beautifully.  More burlap and burlap ribbon to act as a table cloth. (Pardon the garbage, photos were taken while work was in progress!) :)
We use the same grape vine wreath each year and simply add our own greens and color to fit the theme.  This year Kathy added the greens and some red berry picks that I stole from my mom! Thanks mom! 
We have long and bare ledges that surround the piano areas in the sanctuary, but during Christmas they are filled with color and candles.  Kept them very simple this year. Cedar boughs, the usual faux candles (Costco has these for a decent price usually, and they are the best in situations like this!), and realistic but totally fake poinsettia blooms in red and white.
Rather than use a traditional tree topper in the form of a star or even a beautifully designed angel, we went a bit vintage! This angel is part of a very old wooden manger scene that has been at the church since LONG before I was born. She made the perfect topper for our Scandinavian Christmas tree.
I was having issues getting the entire 12 foot tree in the picture! But here is where part of the paper chain ended up!
Thanks to my dad and Dave for putting on the lights, climbing ladders, and getting that angel to stay put!
The ornaments were simple too! Pine cones with red ribbon and traditional straw ornaments with red thread to hold them together. I know Bev, Dave, and my dad did ornament hanging and they did a beautiful job!
Dave and Bev also helped hang lighted garland from the balcony rail and my mom created bows from red and white checked ribbon that I snagged from Costco a couple seasons ago. (Costco seems to be a theme here too...)
Rather than buy new, we reused the same pillar candles in glass that we had last year with the paper chains. The windows only feature the candles and wood cranberry beaded garland that I also stole from my mom! 
Kathy and Brittany took that vintage manger scene and put it to good use! Since the Christmas program needed a manger anyways, Kathy thought it was a good idea to leave it in place all season! I AGREE! I mean this is the true meaning of Christmas! Featuring real hay bales hauled in by Jeremy, Brittany and Larry. And you can see the poinsettias peeking through! 
In our coffee area and front entrance area there is a large blank wall so I thought I'd take advantage of that space and add some good Norwegian cheer! Check out the easy HOW-TO
Downstairs window wells feature more cedar, more poinsettias, and more imitation candles. And the center window features my little IKEA friend.  I also mixed and matched ribbon downstairs, red and white checked with the same sheer red from upstairs. Thanks to my grandma and Kitty for filling the windows with boughs!
Whole window! There are three windows total, all a variation of this concept.  
Somehow I failed to get a picture of the tree downstairs! Uff da! But I can tell you that it features a matching paper chain to the upstairs tree, little red apples, white Christmas balls, and traditional red candles! Thanks to the team of girls and ladies that put that tree together so beautifully!!!

Stay tuned for more festive ideas and creations! Merry Christmas to you and yours!

Monday, September 23, 2013

Socializing with Pie!

Oh goodness... what was I thinking?!?! Somehow I got it in my brain in July that I would have the energy and patience to plan a pie social fundraiser for the month of September at church! Because teaching 4th and 5th graders during the week, middle schoolers on Sundays, being the church secretary, and union president wasn't enough to fill my plate! Haha! Good thing I like crafting, organizing, and eating pie! 

I enlisted the wonderful Lutheran folks' help to take care of the pie baking portion of the activity.  30 pies were on the sign up sheet and I'm pretty sure there were at least 35-40 pies that actually arrived at the social! So of course the 30 pie labels I made were insufficient! But that's a good problem to have! The labels were so fun to make, and I realized they would be really cute as place cards for a party! 


I started these tags by simply cutting blank cards in half.


Each card received a color block base, and then my new favorite crafting find! The Martha Stewart Home Office Avery Labels! 


Each piece was just placed in the middle of the next. And then I attached a button or two for pizazz, and because I just really like using buttons! 


As if making all the little tags wasn't enough prep and decor, I decided to make a banner too! I used cardboard letters as stencils for my EAT MORE PIE pennants.  Each pennant was a 12" by 6"  rectangle  that I put a one inch fold on at the top to use as a hanger.  


I, of course, continued the button theme! 


And used clothespins to secure the pennants to the tulle.


A little swag detail! And a couple bows on each end! Ta-da! 


To make a long post even longer, I incorporated a silent pie auction to the event.  Each pie received a label and a bid sheet on the auction table. Some pies sat on cake stands, baskets, and tiers to add some dimension to the table and gave me more room to fit more pies!   


I have to give a huge shout out of thanks to my parents, Aunt Kathy, and Craig for all of the help setting up and taking down. And a huge thanks to the pie makers, ice cream donators, and those that helped by washing dishes, moving tables, and cleaning the kitchen! There is no way that the pie social and auction would have been so successful without all of the helping hands! And a thanks to Craig for sharing his journey to China and Mongolia with us as the program portion of the event! 

I leave you with a couple pictures of some happy pie eaters! :) 


Monday, December 10, 2012

'Tis the Season (Part Two)

Well hello! Welcome to the part two of my Christmas crafting series! On Friday we had a decorating party at church in order to get the church ready for Christmas. Many hands make light work!

Using the same vintage sheet music that was used for the Adore Him banner, I printed the music onto cream colored paper. I then cut the paper along the long sides, so I got 11 strips out of each piece of paper.  Then it was time to get gluing! I'm quite certain that I made at least 100 feet of chain!


Paper chain went everywhere! Including on the ledges that surround the piano areas.  The printed burlap was picked up on sale at Joann's and the candles are battery powered finds from Costco! My goal was to make the placement look natural and not too symmetrical.  


And more garland! With beautiful glass jar candles from Fred Meyer, on sale for only $1.20!


The Advent wreath this year is also quite simple in nature.  My cousin Brittany did a beautiful job of weaving in greenery and adding the single white poinsettia for accent.  So simple, yet so pretty!


My Aunt Kathy had the great idea to hang white ornaments from the balcony railing with white ribbon.  They are hung at varying levels to give more dimension! 


When in doubt add more burlap! Tree skirt in natural burlap!


Still doubting? Add more paper chain! The tree features the paper chain, white pine cones, and white poinsettias.  The tree was then topped with a white tulle bow (not placed as of the picture).


The altar features white lighted garland and a greenery arrangement with white roses. The altar railing has lighted green garland, the vintage music paper chain, and tulle bows that match the tree. 


Overall our goal was to keep the decorating simple. I think we did a beautiful job of capturing the simple country charm inspired by the vintage sheet music. ENJOY!